After I got my van in June, I imagined starting my building process right away and having it all finished within a few weeks. Of course, my organization and time management skills worked against me and I only just began building my design at the end of August, but the process ran fairly smoothly nonetheless. I already had an idea in mind for how I wanted the footprint laid out and I started measuring the dimensions about a month after I had the van. My original idea was to have my bed extend from behind the front passenger seat all the way into the trunk. I was going to have one half of the tailgate designated for shelf space and food storage, and then room underneath my bed for clothes. After discussing my ideas with my Dad, we realized that I didn’t actually need my bed to run the full length of the interior since my feet would stop about ¾ of the way down the van. With this in mind, we were able to play with more layout ideas for food storage.
As always, my Dad kept coming up with cool ideas that left me with too many options to choose from. All had their pros and cons, but we decided that we would extend my shelf unit in the tailgate to use the entire space, and then have my bed run from the passenger seat back to where the stow-and-go back seats would normally sit.
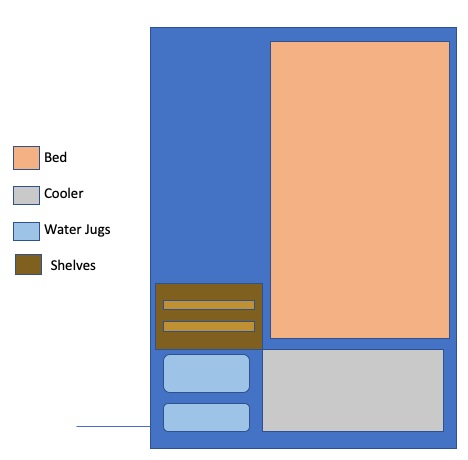
My final design plan came to this –
The remainder of my things were either stored, or put into a box that will be shipped to me at the start of university next fall.
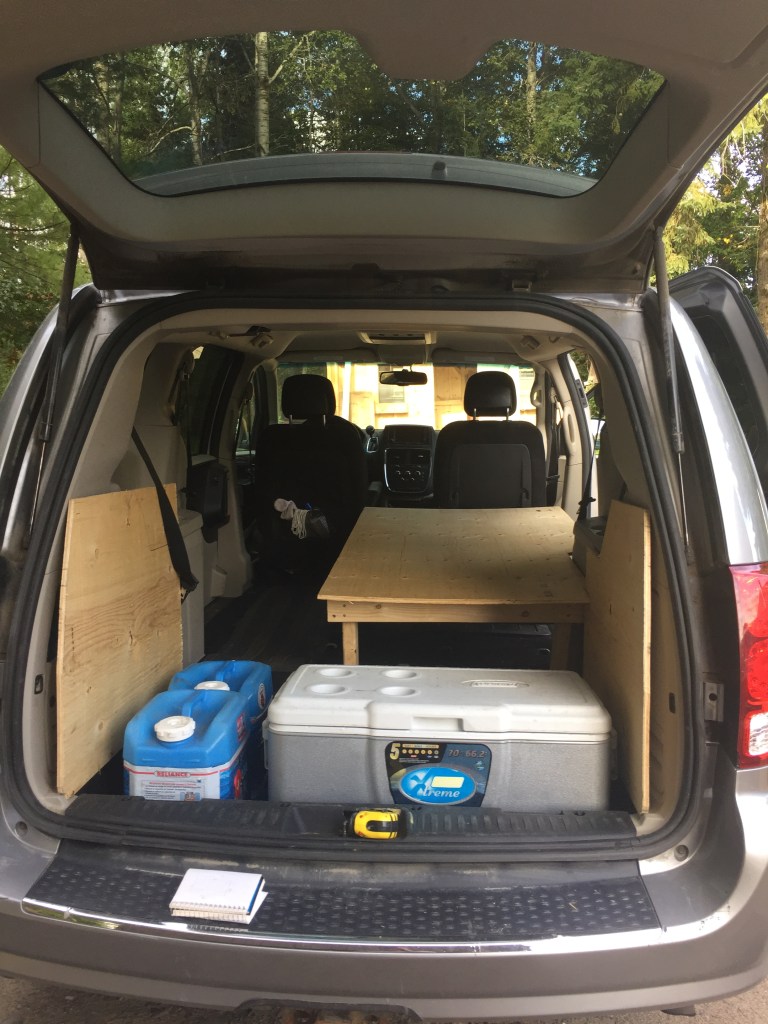
Looking from the driver’s side sliding door, you can see my little platform bed that sits about a foot off the floor. The bed was the second thing we finished in the van. On our first day building, my dad taught me how to safely use the table saw and skill saw we have in the garage, and so I cut all the 2×4 pieces we needed for the bed, and the next day I assembled it myself. Once I had made the rectangular frame for the bed, I screwed in two cross pieces in the middle for support and then began measuring the heights for the legs.
The difficulties with converting a van is that you cannot use a level in the traditional way to build. Because the van sits on uneven ground, when the level tells you that the bed is sitting flat, it is actually telling you where the bed sits level to the ground. This made the assembly of my bed a little tedious. Building the frame was an easy task, but once I had to measure the heights and take account of the slant from front to back in the van, things got a little more difficult. The slant from the front to back of the van was simple enough to estimate because my dad and I had already talked about how I should go about putting that together. But once I had cut the legs to the proper heights and put it all together, I realized that the whole thing was slanted to the left. This happened because instead of using the level with reference points within the van, I had simply set it down on the bed frame and marked where it said it was “level” (which was of course, the uneven ground the van sat on). So, I had to take the legs off again, readjust to the correct levels, and then put it all together again. There is still one leg that sits crooked under the bed, but once we do final touches all of that will be fixed.
All in all, it took me about two hours to assemble the bed and make the adjustments.

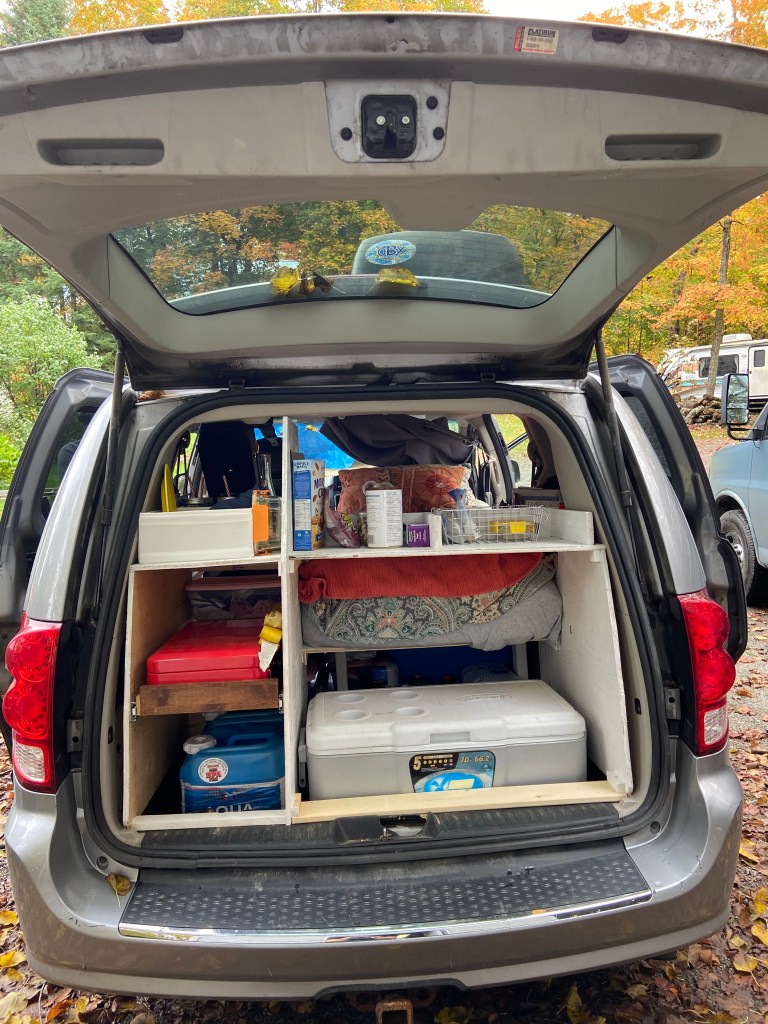
Building the back shelves took 4 or 5 hours altogether until it was completely finished. A lot of our design was done on the fly as the van is not an easy layout to begin with. Any idea we started to put into motion had to be tweaked as we went along to cater to the curvature of the van, how much the unit would move while driving, and for last minute ideas that we came up with.
To fit in my cooler and water jugs that sit in the tailgate, we removed the stow-and-go seats in the back which left us with a large sunk-in compartment where the supports sit. There are three plywood cutouts that run along each side of the van, and one deeper sheet that sits off center in the backseat compartment. These sheets support the shelves in the back. My cooler sits on the passenger side, to the right of the middle support, and my water jugs are on the left. Above the water jugs we have a pullout shelf for my two-burner stove. To build the sliding shelf we bought drawer slides and used a reused piece of oak for the stove to sit on. This will allow me to cook with the tailgate open but remain under the shelter of the trunk. Above all my kitchen amenities I have shelf space for all my dried foods, plates, bowls, utensils and anything else I may need to cook. The left side unit of shelves extends a bit further into the interior of the van so that I have a few shelves for smaller bins that I can access while sitting on my bed.

In the next few days I will have a time-lapse video put together that shows the whole build of the van and how each section came together. The video will be posted on my Instagram and I may upload it to Youtube to make it more accessible.
Here is the video of the build! Go check it out on my instagram as well 🙂
Stay tuned for my first week on the road and check for photos in the gallery!

Nicely done Jules! Very comfy looking.
LikeLike